VFX // Ground Fog (Volumetric)

This is another particle effect I had quite some trouble with. The downside of using a game engine to make an animated short is that some tutorials are specifically geared toward game creators. So there was quite a lot of tampering involved with this one.

This one first require’s you to setup the following material node setup. And then on top of that an instance which will allow you to tamper the particles emitted from the particle emitter.

Setting up a Material Instance from the following setup gives you a two parameters that allow you to affect the fogs Hardness and Extinction rate.

Fog_Mat.PNG

In order for this one to work, I had the following Cascade Settings

Required > Material = Plug in Material Instance

Spawn > Distribution_Constant = 500 

Lifetime > Distribution_Min= 0 / Max = 20

Initial Size > x/ 100, y/0, z/0

Initial Velocity > All Zero

Cylinder > Constant = 300

At first, you won’t be able to see any results by default. You need to enable Volumetric Fog under Exponential Height Fog in order to see the particles.

Final Result

Fog.PNG

VFX // Water Fall

This was a fairly straight forward particle effect to pull off. Carefully following this tutorial I achieved the desired effect.

Creating a water texture first through the use of particle and vertex colours getting multiplied together and then multiplied again, these get put through a scalar parameter. These then are plugged into the emissive node.

Then a texture sample is multiplied through another scalar parameter, then plugged into the opacity node. This gives control over the waterfalls colour, emission and opacity.

The material is then plugged into Cascade’s required material tab. Within spawn, the max and min is both 20, therefore creating an steady spawn rate. The initial size stays 50 across all parameters. To give the waterfall direction there is some tampering to be done in the Initial Velocity tab.

Waterfall.PNG

To make it appear that the waterfall was expanding outward the further the water falls, the tutorial recommended that you tamper with the Size by Life tab.

At 0, the InVal will be 0, and the OutVal will be 0,5 accross the x,y,z.

At 1, the Inval will be 1, and the Outval will be 2.0 across the x,y,z.


At this rate, given that it was just a background prop that we wouldn’t see very much of I decided to leave it there as I was happy enough with the result. Due to time constraints I needed to get back to lighting environments, so should time allow it I will probably pick this one back up again.


YouTube. (2017). Request | Waterfall | Unreal engine 4. [online] Available at: https://www.youtube.com/watch?v=iC6CjIMm8ao [Accessed 11 Apr. 2019].

Co2 Blasts

I can’t find the tutorial I followed for the life of me, but you’ll have to take my word on this one because im nowhere near good enough to come up with something like this myself…

Trying to explain this one as best I can, the box highlighted (1), has two panner nodes plugged into two texture samples. By default these will start panning. By multiplying in a Radial Gradient Exponential, the 4 corners are masked out, which softens up the particle shape. This is the main factor.

The next step is to create a material instance that allows tweaking later.

Co2.PNG

The following settings are what I used in the Cascade Particle System. These settings resulted in the following.

As you can see from the test video, its more like a kettle if anything. However after talking to Brian, one of our lecturer’s, had a look at this for us and ran us through adding some drag and tampering with the initial velocity and size by life which caused the particles to shoot upward faster, and spread outward. Then it came to animating it. Brian pointed us in the direction of the timeline nodes within blueprints. This allowed us to key the start and end time of the particle emission.

Co2_8.PNG

The following is the result, is exactly what we were looking for.

Creative Futures // Portfolio and Development

For Henry’s Creative Futures module, we are required to design posters, a business card and prepare our presentation boards for the degree show.

I first started with the business card.

I read an article called “Rules of an Effecting Business Card”

https://www.thebalancesmb.com/effective-business-card-2951735


1. Include only the most important information.

For myself, I only intend on having:

  • My Name
  • Career Speciality
  • Contact Email and Website
  • Instagram
  • LinkedIn

2. Make sure it’s legible.

Again, this one was taken into careful consideration, light blues and whites against dark should help.

3. Avoid full coverage.

Front and back I have used plenty of negative space.

4. Get them professionally printed.

I intend on going to vista print.

5. Design for your audience.

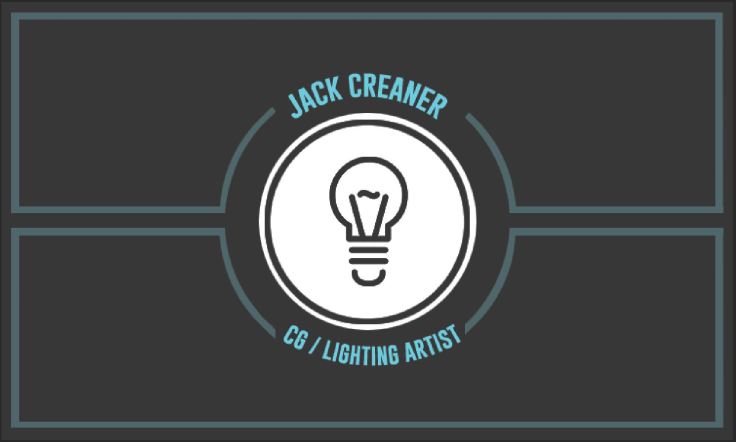
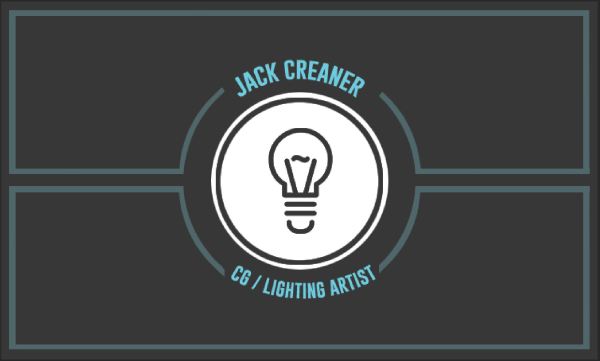
With the addition of themes within the CG/ Lighting department it should get my career choice across. E.g. A Light-bulb on the front side and a spotlit text-box on the back. Will become clear on the card itself.

6. Use special finishing options carefully.

For this i’m cosidering having the spotlit beam glossed over, that or have everything but the spotlight beam coated with a matte finish.


So going off these notes above, I began designing. Ideally after final year i’m hoping to pursue a career within the lighting/ cg department, so I began brainstorming on how I could get that across on my card. I knew I wanted to play with graphics and minimalist design.

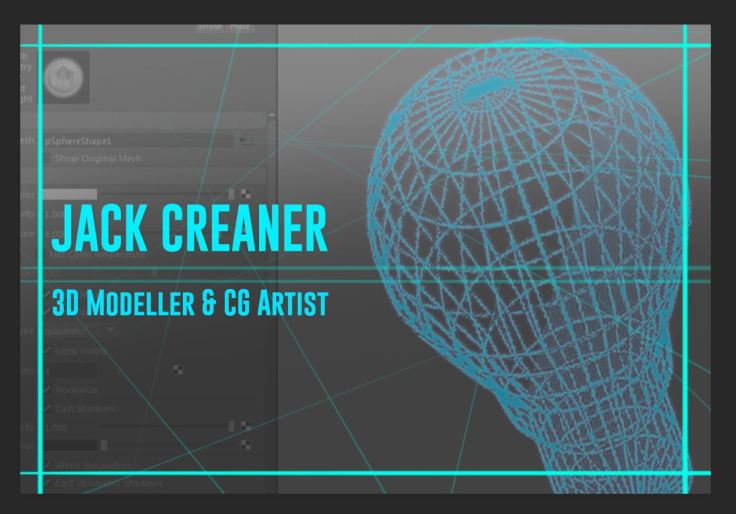
I first thought maybe a wire framed light bulb would convey that I can 3D model and that i’m a lighting artist. And while it’s just a mockup design, I really don’t think it worked.

MockUp


The font however, I quite liked. After searching and having a read over the eBook “Meet your type – by fontshop San Francisco”, I carefully made the decision on what font I was going to choose.

After some searching, I found Gobold, which is a Sans Serif font. A Serif is a “slight projection finishing off a stroke of a letter in certain typefaces.” A Sans Serif font is a font that doesn’t feature any Serifs. I felt like this font was the perfect fit for my business card. Given that our eyes are naturally drawn to text first, a font that is bold and straight to the point was the perfect fit. And I think it does it’s job well.

SIDE A // FINAL DRAFT

SideA


SIDE B // FINAL DRAFTS

SideB

SideB_V2.JPG

While i’m content with how Side A looks, I debated on Side B. I liked the simplicity of the spot lit circle, but featuring one of our lit environments might make it a bit more memorable when it comes to people who have seen our animation.

In the end I decided to go with the spot lit circle for Side B but just as a place holder. I think if I get a nice render closer to the end of the project I may substitute it in but as of right now I think the Side B I decided on ties the theme of the card together better.


Boards
Jakub and I talked about Board layouts and where everyone should be placed. From Left to Right we have Jakub, Phoebe, John and then myself. We felt this order was logical as it goes through the pipeline.

Jakub // Desiging and Modelling our Characters, along with Animation
Phoebe // Director, Storyboarder, Animatic and Animator
John // Environment Artist
Myself // VFX and Lighting

It runs through the pipeline. This way seeing as John and I worked quite closely together, we’ll possibly be able to show off some of our shared work together.

We also decided to have a life size cut out of our character. The pose isn’t final,
just a place holder for now.

boards


For my own personal layout, i’m wanting to have some of my lit environments and scene breakdowns on my screen. For example, and unlit scene with Light fade ins, and have VFX isolated from the environment. Possibly rundowns.  I’ll be filling out the rest of my board with assets i modelled and textured.

my boards.jpg


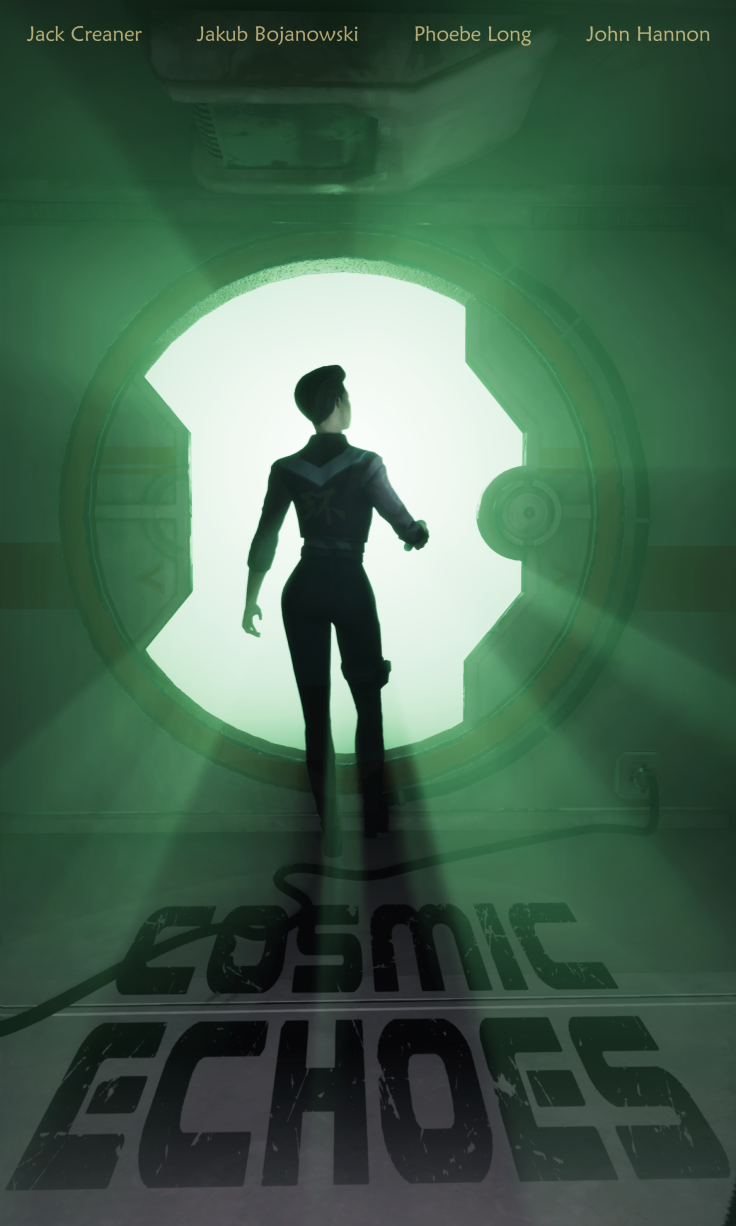
As for our final draft on the poster, Jakub and Phoebe (our creative directors) took charge there and this is one of our final drafts. (Not Final). We quite liked this one as it conveys a sci fi feel, a character possibly stepping out of their comfort zone, and does’t give away the plot of our animation but is enough to captivate attention.

55557158_2011144682268021_5442247949474070528_n (1).png


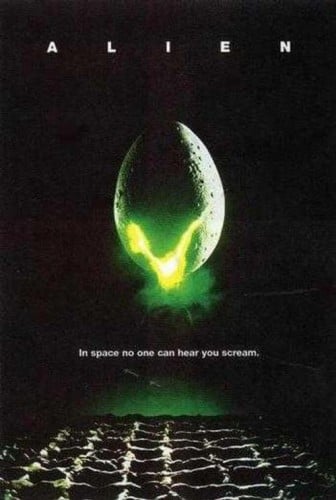
Early on I did a brief mockup myself based on feedback on one of our earliest drafts. We were told to maybe think about the alien and blackhole element and play with that. Maybe create something a little more obscure and abstract.

Poster MockUP.jpg


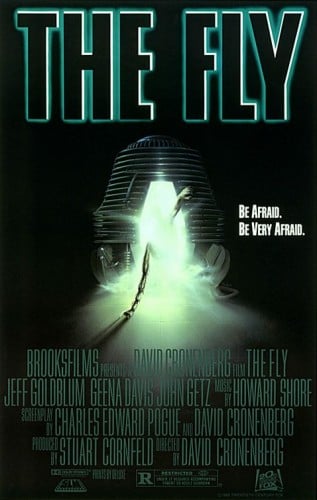
I read an article on cheatsheet.com on the “10 Greatest Horror Movie Taglines of All Time”, while looking for inspiration on what to add to the poster, and one that stood out was I Am Legend’s “The Last Man on Earth is Not Alone.”. I quite liked this one as something about it hit’s close to home when it comes to our animation. The Fly’s “Be Afraid, Be Very Afraid” and Alien’s “In Space, No One Can Here You Scream” really stood out to me also, although I don’t think there was any way of doing a variation on these without just ripping them off.

When it came to the actual design side of it, I read that you should make an impact. I decided to make the alien eye a main focus. As mentioned above, this theme inspires feelings of mystery and keeps it vague. But then it states that there is an alien presence and we’re trying to keep that hidden so the big reveal has much more impact. The articles i’ve been following also states that having one large graphic and making the poster as a whole easy to read also really goes a long way. (On that note, please ignore that I misspelt the word “Door”. (Dor?)

https://designshack.net/articles/inspiration/10-tips-for-perfect-poster-design/

https://www.cheatsheet.com/entertainment/theyre-here-10-greatest-horror-movie-taglines-of-all-time.html/

https://www.creativebloq.com/print-design/how-design-poster-pro-tips-7133634

Related imageSource: 20th Century Fox


Source: 20th Century Fox


COSMIC ECHOS – Presentation and Feedback Notes

Cassette Futurism’s COSMIC ECHOS

Clicking on the link above will take you to the Presentation.

In terms of feedback, our presentation pitch went very well. Everyone was more a less happy with where we were at and there went to many changes to be made. The only notable feedback we got was:

“Maybe think about the creature having eyes, giving the creature eyes makes it easy for an audience to connect/ empathise with it. Maybe consider that?” 

Originally we planned on barely showing the monster at all, with the exception of the eye shot and the odd reaching tentacle. Then finally, showing the full creature at the end, but barely lit so you don’t get to see what it’s fully looks like. We based this on H.P. Lovecraft’s approach to describing Horrors. He doesn’t really describe them at all. He’ll give away little parts of information and leaves it to the reader to put the image together. In terms of lore, his monsters are just too much for the human mind to comprehend. Most people go insane upon viewing them, and we wanted to work that in somehow. It would really play on that fear of the unknown element.

For the eye shot, where she turns the flashlight on and it shines into the monsters eye over her shoulder, we planned on cutting to an extreme close up of the eye itself. Showing the eye dilation, then cutting away. This shot wont even be on screen for a second, and then we’ll show that frenzied chase to show how animalistic and pure instinct driven this creature is in nature. Hopefully this will combat the eye feedback.

Then Jordan from class recomended the software Dehumaniser for our monster sound creation. It’s a piece of software that allows you to alter voices and sounds.

Henry also briefly lent us the book “The Resurrectionist: The Lost Work and Writings of Dr. Spencer Black” which we will be studying further. 

But in general, we’re happy with how our pitch went, and the feedback was helpful.


The Impossible Hole

Our short features “an impossible hole”. A gate/doorway to an completely separate dimension. It’s a term Phoebe came up with when reading over The Heroes’ Journey, and researching other narrative devices.

Our impossible hole, is a crack through a window. There’s 4 large panes of glass, sitting side by side looking out into space. But one of those windows is cracked wide open. Rather than the outside space ripping everything out through the crack, everything is still. And on the other side of the hole, there’s a complete separate reality.

Watch out. The gap in the door… it’s a separate reality. The only me is me. Are you sure the only you is you? – The Brown Talking… Bag(?) / Silent Hills. PT (2014)

I quite liked this quote, lined up with our project quite well so i couldn’t not. So yeah, a separate reality. Through the cracks there’s a cavernous dungeon impossibly sits waiting for our protagonist.

We were first thinking, what if the environment naturally started changing and becoming that dungeon environment? Metal becoming stone, pipes twisting and warping into lit sconces, greenery and vines creeping in? We decided a hard barrier would be better, and maybe have these changes in environment would be the stone to metal as she’s running away back to the cockpit.

While they’re not the best, I attempted some photo bashes to get my ideas across.


This slideshow requires JavaScript.


Time Loops // Black Holes are the result of Time Distortions?

So we’ve finally nailed our concept and story. We started off with the prompt/ concept “What if Black Holes caused Time Loops?” and began figuring things out from there.

In the abyss of space, an inquisitive pilot seeks answers when her ship chances upon an impossible doorway into a black hole but only discovers that she must escape the monstrosity lurking within.


So with our animation ending with a call back to the start, a literal time loop. I immediately got stuck into researching black holes and ways they could possibly drive our project.

Within black holes, there’s this point called The Event Horizon. Say you’re slowly drifting towards a black hole, once you pass this point, to an outside observer you would appear to be totally still, frozen in time. To you (assuming you’d impossibly survive) you would continue to drift on forward toward the Black Hole. But to the observer you’re frozen. Gradually your still image would be shifting into a red hue before fading out of existence.

It’s all to do with light. The Event Horizon is the point where light can’t escape, so beyond this point we have no idea what happens. What if… Things inside are trapped in a time loop of their last moments. What if… it’s a door to another dimension. What if… there’s something inside that can manipulate time for its own benefit. What if this monster is looping a pilots last moment over and over so it has dinner for a lifetime? Who knooows.


So while black holes may not be the main focus of the animation, we’re going to have a subtle nod to it being because of a black hole. At the end of the animation, when the pilot leaves the cockpit, she has just about missed the warning on screen. !ALERT-BLACK HOLE WARNING!

We’re thinking that the animation is based within that Event Horizon. The character has accidentally and unknowingly drifted into the black hole and is stuck in a time loop forever(?).


Research Potential: The Sinking City (2018)

Our idea of time loops were initially sparked when we watched the trailer for The Sinking City (2018). 

“The Sinking City is a third person adventure game, inspired by the works of American horror writer H.P. Lovecraft. It is our biggest and most ambitious project up to date, in terms of gameplay, story and overall experience we are aiming for. We are building The Sinking City on three main pillars – open world, open investigation, Lovecraft – which define how it will play and feel.”

http://frogwares.com/discover-the-sinking-city/


We loved the idea of the characters death initially being the reason for the character to investigate which is where the knocking door element came from upon viewing this.

Unity Lighting

Seeing as i’m responsible for lighting our scenes in unity, I’ve started researching. I’ve played about with Unity a little before but lighting a scene is completely alien to me.

I met up with Beth Kirkpatrick, a student from 2 years back and she gave me loads of advice and links on  how to  light in unity. She sent me this youtube series that takes you through the process step by step. It’s fairly similar to the style of lighting we’re aiming for. I might just add more neon to tie in with our aesthetic. I’ll be following this series quite closely over the next few days.


I’ll also be looking to add some volumetric lighting into the scene, mostly for the corridor shots. We want to convey that sense of mystery and eeriness, and I reckon volumetric will convey that real nicely. This following video’s pretty close to what i’m hoping to create. Especially in the dungeon/ cavernous environment. I can achieve this through a simple plugin for Unity.

(I say simple, tune into the next post to hear about my struggles.)


As of lighting that’s all I have right now. Clicking the following link pulls up a moodboard, it’s what we’re hoping to recreate in our project.

https://jackcreaner.wordpress.com/2018/10/13/lighting-mood-board/


Blog at WordPress.com.

Up ↑