*cough* anyway, after weeks upon weeks of hard work (I literally joined the team days ago) the teams hard work payed off. We were accepted into the BFX Competition,
“BFX is a student competition designed to give you direct exposure to cutting edge practices and showcase your skills to some of the best supervisors, producers and artists in the VFX and animation industry.”
So long story short, i’m in a team with Becca Blair, Cassie Galloway, Lorna McFall and Rhea Hanlon and together we are Team Baltic Tea. Can’t wait to get started!
As much as I enjoyed first year, I loved this year so much more. There was a lot more freedom in this year, especially for that last semester. I’ve learned so much and now I am much more confident in my 3d capabilities. I now know how to export texture maps (normals, displacement maps, height maps, specular maps etc.) and how to apply them, how to effectively manage a project in a workplace environment and in general, create work that is up to standard. The mini placement project with Mashmob was great, it showed me that working in the industry isn’t as scary as I thought it would be. I learned how to meet the client’s deadlines as best as possible, and even that sometimes there’s only so much you can do to please the client. If it wasn’t for this project I wouldn’t have learned how to texture in substance painter until much later, how to simulate shatter dynamics or how to use blend shapes. So it’s safe to say I have learned so much from this project.
For the personal project, Jakub and I teamed up. Seeing as we both had similar ideas in mind we thought it was a pretty logical step. We worked great together as a team and I’d happily work with him again. The project itself was a perfect opportunity to get some extra showreel content specifically related to the stuff you want to specialise in.
Over all this semester was the perfect set up for placement, and unlike a few months ago where even the mention of placement terrified me, I’d say im ready for it! Placement, come at me.
So Jakub and I teamed up for this project. We both had very similar ideas so we thought why not team up. The general idea of our scene is that there’s two separate parts. There’s the corridor and then the room. So the scene itself starts in the corridor. It’s very sci-fi spaceship hallway inspired. There’s a “survivor” at the end, crouched down hiding behind a crate. Just through the doorway is the room. It’s a lab/workspace type of room, but there’s a huge hole blown out of the wall so the room is exposed to Space outside. So everything in the room is floating. The narrative in the scene is that one of the survivors crew has hideously mutated into some messed up tentacle-y spider-like thing. (If you’ve ever seen John Carpenter’s The Thing 1982, that’s the general idea we’re going for.)
So the project began with ideation, references and inspirations. The two of us watched both versions of The Thing. The 1982 original and the 2011 prequel remake. Then we moved onto Alien 1979. We wanted to recreate the atmosphere of these two franchises in our scene.
So once we had the general theme of the scene established, I got stuck into doing concept art for the Alien.
We eventually decided on doing the Spider like idea. So before getting stuck into the alien I started on the Corridor’s initial shape.
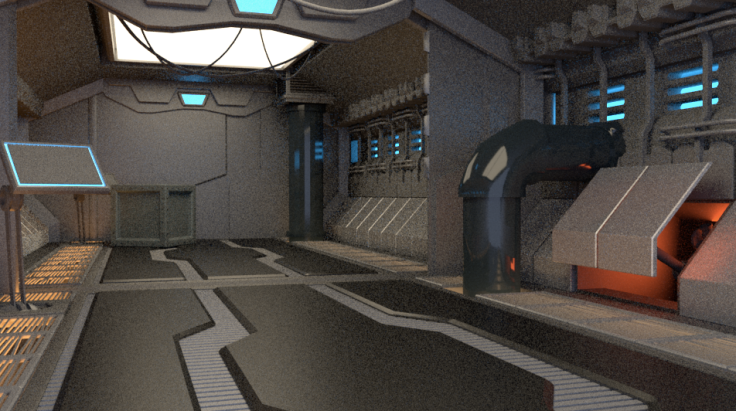
Once I had the corridor’s shape done I began adding the flooring, the wall panels and added some lights and texture to see how it would look. I decided the floor panels were way to small so I decided to remake them but bigger.
After I remade the floor, again I started experimenting with lights coming up through the vents and started adding things into the scene such as the pipes and door control panels. From here, I started adding the finer details such as the pipes and brackets on the walls.
The Final Corridor
The Alien:
Now that the Corridor was done and out of the way, I decided to get cracked into the Alien. So when I was starting the Alien, I first downloaded a pre-made Human Body model from TurboSquid.com.
I started the Alien by first rigging the human body model. Seeing as I wanted it to be in the hanging position (because of the spider legs) I thought it would be best to rig it first. I used the Human IK tab. Once it was rigged I began posing it.
So this is the rigged character. Now that it’s posed I brought it into zBrush. To summarise my work flow, I usually start in maya for blocking out the model, and then start adding detail in zBrush. When the character was posed how I’d like it to be I brought it into zBrush and started raising parts of the back to make it look like it was split open. Once I was happy with how that looked I brought it back into Maya and started adding the teeth/ tentacles.
Now that the teeth and tentacles are in place I began adding the spider legs. I’ve left gaps in between them so that they can be reposed later should we need to repose it. And that’s everything I did on the Alien. I then sent it on to Jakub for it to be detailed.
The Room:
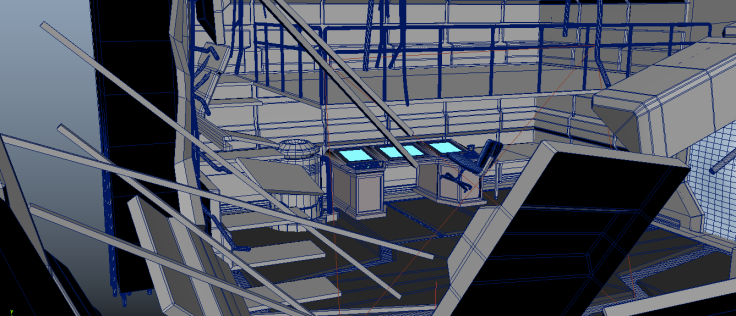
For the room, we knew we wanted there to be a massive hole in the wall, some sort of computer, an upper level (just to fill out the scene a bit) and clutter/ damage in general. So i got stuck into that. First I started with the shape of the room itself, and then started creating the hole and the foundation bars inside the wall. When i finished that I started putting the floor panels down and raised one of them to look like it was floating off into space. For the ship damage itself, I followed a digital tutors tutorial on how to make the scene’s damage look real and believable. The tutorial I follewed was “Digital-Tutors: Modelling Architectural Destruction in Maya.”
From here, I started adding stairs and railings into the scene and then started filling out the scene in general with models like the terminal computer, the table and the planet outside for example.
All the items on the table bar the lightsaber (sneakily put that in there because it looked like it belonged in the scene) are models people from the class kindly donated.
Thank you Phoebe Long (Gun), Cassie Galloway (Broken TV), Johnny Rooney/Philip McDowell (Science apparatus), Samantha Quigley (Books/Stationary), Michelle Beggs (Retro Computer).
FINAL RENDERS
Now that the project is done I can honestly say I’m happy with how it turned out! This is definitely my best work to date. If time would have allowed it I would have liked to texture and light it all properly but I’m planning on texturing it all over summer for my showreel. But yeah, i’m really happy with how it looks! Jakub and I worked well as a team and I hope to work with him again.
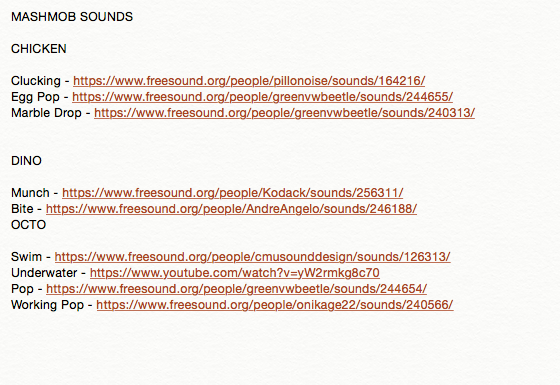
So the team have assigned me to creating the sound for the animation. Everything was pretty straight forward. I gathered the sound files i’d need from freesound.org with the exception of the Banjo, which was played and recorded by Jakub’s cousin and the Gorilla’s drum that was simulated by myself. (I literally just pressed the letter K on the keyboard over and over in sync with a metronome.) I’m not able to upload sound here, it can be heard in the final animation. I used garage band for all editing.
Sources:
Freesound.org – Freesound.org. 2017. Freesound.org – Freesound.org. [ONLINE] Available at: http://www.freesound.org/. [Accessed 27 April 2017].
Shortly after I sent the model to Robert for rigging, it was sent back to me for it to be skin weighted. From there the character was ready to have it’s face set up. Becca had created faces in the style of Aardman’s purple and brown characters. One set of eyes were modelled and then she modelled 5 different mouths in different shapes for us to switch between. So I got stuck into setting up the Blend Shapes.
Once I had a general Idea I set up all of Becca’s mouth models in a row, and began hooking them up in the Shape Editor tab in the Animation Editor. We ran into a lot of problems when setting them up. When I had all the the models set up in the weight/driver tab, I decided to test them out, and for whatever reason the mouth shapes would literally float away from the model. After cutting some of the models out, I began to realise certain models were the cause of the problem, so I narrowed it down to the 3 working shapes (which coincidentally happened to be 3 shapes we needed, and after a lot of trail and error, I finished setting the Blend Shapes up. I then set up the drivers in the channel box so they can easily be animated. The 3 mouth shapes were split into 3 controls. One for opening and closing the mouth, one for opening it wider and then one for smiling/chewing animation.
So Eve started the Dinosaur and sent it to us. It was sent directly from zBrush and had been decimated pretty heavily so I had to retopologise it. As I was starting, I decided to look at the topology for different animal models for reference and started quad drawing from there.
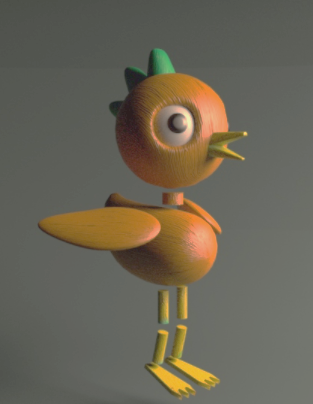
So i’ve started work on the chicken character. We talked as a team about how we wanted the chicken to look and we eventually decided on a puppet like toy design. The idea came from one of Becca’s concept pieces.
So based on her idea I started modelling the chicken and this is what I first came up with. I sculpted the head in zBrush and added the additional pieces in Maya. Once I was happy enough with the model, I re-topologised the head in a way that I could attach the beak so animating it will be much easier. Once it was retopo’d, I uv unwrapped it and then began texturing and this is the model I first presented.
Initially, Mashmob were happy with this model, but they thought maybe the eyes could act the same way real birds do, as in facing outward. Another recommendation was that I should maybe add some wood grain as a texture to make it look more like a puppet. With this in mind I started to teach myself how to use Substance Painter, and with some help from Becca I managed to create this. So to create the Chicken, I used one of the wooden material presets and adjusted its height to give it that wood grainy sort of look Mashmob were looking for. I then used the PVC plastic paint option and started painting onto the model and it resulted in it looking like it was hand painted. I even threw in a few “mispainted parts” so it looks like it has been painted by a child to give it a toy like look.
So for now the Chicken is done! I then sent it off to Robert to be rigged and then from there I skin weighted it.


Recent Comments